You’re about to commence on a journey to transform your dog into a well-behaved companion. Training your dog requires patience, consistency, and positive reinforcement. As you begin, focus on building trust and communication through engaging activities like fetch and walks. Observe your dog’s body language and reward desired behaviors. With time and effort, you’ll see significant improvements, but it’s essential to address behavioral issues promptly – and that’s where your challenge begins. And while you’re celebrating training milestones, why not explore luxurious rewards elsewhere? Discover casinos con reembolso de dinero en apuestas for a premium entertainment experience that offers cashback on your bets.
Building a Strong Foundation: Establishing Trust and Communication
Before you begin training, establishing trust and open communication with your dog is essential. You need to build a strong foundation to guarantee effective communication and successful training.
Engage in bonding activities, such as playing fetch or going for walks, to strengthen your relationship and create a sense of mutual respect. As you spend quality time with your dog, pay attention to their body language and behavior. This will help you understand their needs and wants.
Effective communication is key to avoiding misunderstandings and establishing a strong partnership. By establishing trust and open communication, you’ll set the stage for a rewarding and successful training experience. Your dog will be more receptive to learning, and you’ll be able to tailor your approach to their unique needs.
Positive Reinforcement Training: Rewarding Good Behavior
Success in dog training hinges on a powerful principle: rewarding desired behavior. By focusing on what you want your dog to do, rather than what not to do, you create a positive and encouraging environment. This approach is known as positive reinforcement training.
Clicker training is a popular method that utilizes a small device to mark the exact moment your dog performs the desired action, followed by a reward. Reward systems, such as treats and praise, motivate your dog to repeat the behavior.
As you consistently reinforce desired actions, your dog will begin to associate the behavior with the reward, leading to a strong and lasting connection. With patience and consistency, positive reinforcement training can yield remarkable results.
Addressing Behavioral Issues: Strategies for Common Problems
How do you tackle the inevitable behavioral issues that arise during dog training?
It’s crucial to address these problems promptly to prevent them from becoming ingrained habits. You’ll need to identify the underlying causes of the behavior and develop a strategy to overcome them.
For instance, if your dog suffers from separation anxiety, you can help alleviate their distress by gradually increasing your departure time and leaving a familiar object with your scent.
To achieve barking control, you can teach your dog the “quiet” command and reward them for remaining silent.
Consistency and patience are key when addressing behavioral issues. With time and effort, you can help your dog overcome common problems and strengthen your bond with them.
Teaching Basic Obedience Commands: A Step-by-Step Guide
As you begin teaching your dog basic obedience commands, it’s essential to establish a consistent training routine and clear communication.
Start by choosing a quiet, distraction-free area where your dog can focus on you. Use positive reinforcement techniques, such as clicker training, to encourage good behavior.
Guarantee command consistency by using the same commands and hand signals each time you give a command.
Begin with simple commands like “sit,” “stay,” and “come.” Break each command into smaller steps and reward your dog for each success.
Be patient and remember that consistency is key. With time and practice, your dog will learn to respond to basic obedience commands, laying the foundation for more advanced training.
Advanced Training Techniques: Agility, Tricks, and Socialization
Now that your dog has a solid foundation in basic obedience commands, it’s time to challenge them with advanced training techniques.
You’ll teach your dog to navigate agility courses, perform impressive tricks, and interact confidently with people and other animals. Agility training provides mental and physical stimulation, while trick training strengthens your bond and encourages creative thinking.
As you progress, you’ll find that these techniques complement each other, making your dog a well-rounded and responsive companion.
To start, set up mini agility courses in your backyard or sign up for classes at a local training facility. For trick training, begin with simple commands like “shake” and “roll over,” gradually increasing the complexity as your dog becomes more confident.
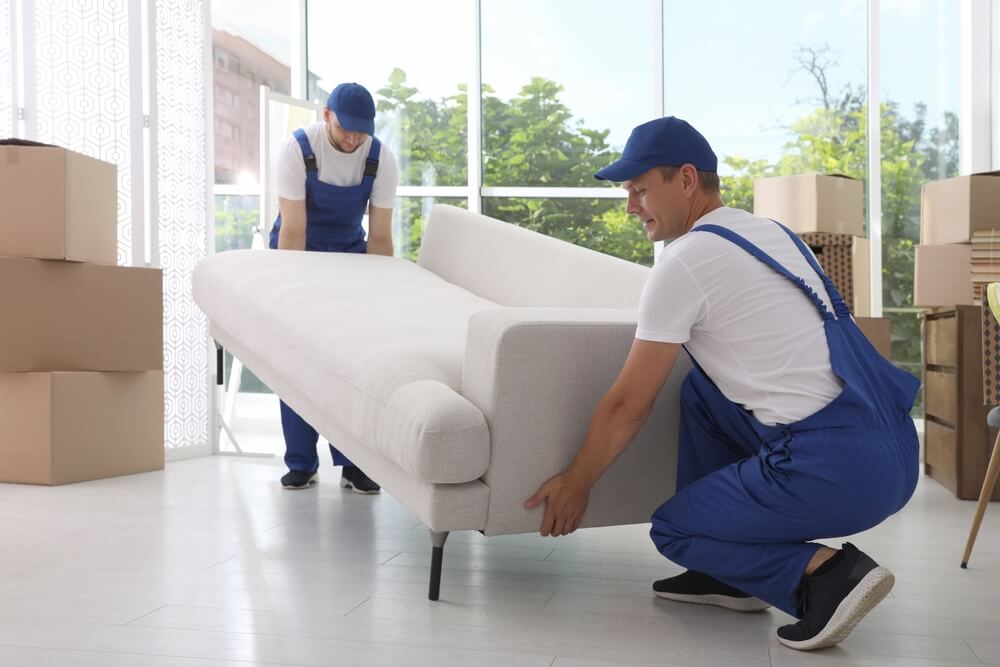
Moving can be a daunting experience, especially if you’re relocating to a new city or even just a different neighborhood. Round Rock, Texas, with its growing community and rich cultural heritage, offers a vibrant place to call home. But whether you’re moving to Round Rock for work, family, or a fresh start, hiring the right moving company can make all the difference. In this guide, we’ll explore how to choose the best Round Rock Mover, tips for a smooth move, and what to expect when moving to this charming city.
Why Choose Round Rock Mover?
Round Rock is a rapidly growing city just north of Austin, known for its excellent schools, family-friendly neighborhoods, and booming job market. When it comes to moving, hiring local movers who are familiar with the area can make the entire process much easier. Round Rock Mover have the local knowledge to navigate the city’s roads, residential areas, and logistics, ensuring a smooth and efficient move.
Local moving companies also understand the region’s unique requirements, such as dealing with Texas heat, which can add another layer of complexity to your move. With experienced movers by your side, you can rest assured that your belongings are in good hands.
Choosing the Right Round Rock Moving Company
When choosing the best movers in Round Rock, consider several factors. First, research online reviews and testimonials from past customers to ensure a reliable and quality service. Experience is crucial for handling delicate items and avoiding common pitfalls. Ensure the moving company is fully licensed and insured to protect against accidents or damage. Ask about their insurance policies and full value protection for your items.
Moving companies offer a variety of services, including packing and unpacking, as well as moving supplies like boxes and tape. Choose a company that can offer comprehensive services that suit your needs. Finally, ensure cost transparency by getting a clear estimate from the moving company and being wary of companies offering unusually low rates, as these may indicate hidden fees or subpar service. A reliable moving company will offer transparent pricing without surprise charges.
Tips for a Stress-Free Move to Round Rock
To prepare for a smooth transition during a move, consider the following tips:
1. Declutter: Before packing, go through your belongings and decide what you need to bring. Donate, sell, or throw away unnecessary items to make the move easier and save money.
2. Pack smart: Start early and pack systematically, labeling boxes by room and including a list of contents. This will help both you and the movers stay organized and make unpacking a breeze.
3. Consider timing: Summer is the busiest season in Round Rock, with higher rates and more competition for moving services. Plan your move for the fall or winter when moving companies are less busy and may offer lower prices.
4. Prepare for the weather: Texas heat can be intense, especially during the summer months. Stay hydrated and avoid moving on the hottest days. Start early in the morning or later in the evening when temperatures are cooler.
5. Communicate with your movers: Provide details about special requirements, such as heavy or fragile items, narrow doorways, or unique challenges at pickup or drop-off locations, to help them handle your move efficiently.
What to Expect After Your Move to Round Rock
Once you’ve successfully moved into your new Round Rock home, take some time to explore the city and get to know your new neighborhood. Round Rock is known for its family-friendly atmosphere, parks, and recreational opportunities. The city boasts excellent schools, including Round Rock Independent School District, and is home to major employers like Dell Technologies.
Round Rock also offers plenty of outdoor activities, from hiking and biking trails to baseball at the Dell Diamond stadium. Whether you’re interested in shopping, dining, or exploring local art, you’ll find something to enjoy in this growing city.
Conclusion
Hiring the right Round Rock Mover is an essential part of a smooth and stress-free relocation. By choosing an experienced and reliable moving company, preparing early, and following a few key tips, you can make your move to this thriving Texas city easier than you ever imagined. With the right planning, you’ll soon be settling into your new home and enjoying everything that Round Rock has to offer.
Redefine Your Space with Striking Wood Panel Decor
Why Wood Panel Decor Is the Ultimate Interior Game-Changer
Wood panel decor is more than simply a fad; it’s a timeless update that combines beauty, functionality, and warmth. Whether you’re rebuilding a single room or updating your whole house, wood panels provide limitless stylistic options. Their adaptability to rustic, contemporary, minimalist, and bohemian themes makes them a popular choice among homeowners and designers. One of the easiest ways to modernize your home is by incorporating
beautifully crafted wood wall panels in interior design styles, wood panel decor for modern homes can elevate aesthetic appeal. elegantly designed wooden plank accents add rustic charm, wood panel decor at luxury hotels enhances welcoming atmospheres. uniquely styled timber cladding installations provide creative solutions, wood panel decor in commercial spaces contributes to brand identity. carefully selected hardwood finishes ensure sustainability, wood panel decor from eco-friendly sources supports environmental conservation.
beautiful wood wall paneling in a modern interior accentuates the space, bringing warmth and a rustic charm. elegant timber cladding for enhances traditional aesthetics, often found in luxury homes. impressive plywood sheets by can transform the attic into an inviting room, perfect for cozy evenings. stylish wooden strips when used creatively, can underpin a minimalist decor theme, adding sophistication and grace. wonderful veneer applications are perfect for upgrading the cabinetry, giving rise to a seamless and polished look.
.
Wood panel design adds a natural elegance and texture that flat-painted walls just cannot replicate. From comfortable corners to dramatic accent walls, this design feature contributes to the ambiance of a place.
Design-Forward Ideas to Inspire Your Wood Panel Decor Project
Dramatic Accent Walls
One of the most common applications for wood panel décor is to create a vibrant, textured accent wall. This focal point catches the eye, provides architectural interest, and quickly transforms the room’s identity.
Custom Art Displays
Instead of standard paints, try transforming your wood panels into artwork. Geometric panel patterns, wood mosaic designs, and even burned wood methods may be framed or applied directly to a wall.
Mixing Materials for Modern Flair
To add a contemporary edge, combine wood panels with materials such as marble, brick, or metal. Wood panel décor, when combined with industrial elements, offers balance and visual interest. Learn more about elevating your space with style at
beautiful hardwood panels can transform any plain room into a stylish space. stylishly accented walls provide an immediate uplift to older homes, making interior design effortlessly elegant. elegant veneer finishes offer a luxurious touch, seamlessly enhancing the ambient atmosphere. ambient grain patterns captivate attention, embedding a unique personality into the home’s aesthetics.
architectural wood paneling adds an element of rustic charm to contemporary homes. elegant wooden wall treatments enhance the interiors by providing an acoustic advantage. beautiful timber cladding is used by designers to create a focal point in living spaces. sophisticated hardwood veneer brings an organic feel to modern room settings. classic grooved panels are known for their durability and adaptability in various design schemes.
.
Installation Essentials: What You Need to Know
Installing wood panel decor doesn’t have to be complicated. Whether you’re a DIY enthusiast or working with a contractor, keep these tips in mind:
Choose the right wood: Pine, oak, walnut, and reclaimed woods all offer different textures and tones.
Plan your layout: Decide on vertical, horizontal, herringbone, or chevron patterns before installation.
Prep your wall: Clean and level the surface to ensure a smooth fit.
Secure panels properly: Use construction adhesive or nails based on the panel type and surface.
Smart Ways to Style with Wood Panels
Where to Use Wood Panel Decor
Think beyond the living room. Wood panel decor can elevate nearly any space:
Bedrooms: A panel headboard wall adds sophistication and texture.
Home offices: Wood panels bring warmth and a professional touch.
Dining rooms: Use panels to create a cozy, upscale atmosphere.
Hallways: Liven up long walls with stylish vertical paneling.
Design Pairings That Shine
Pair your wood panel decor with complementary textures and colors:
Soft textiles: Wool rugs, linen curtains, and velvet cushions.
Metal finishes: Brass, matte black, or brushed steel accents.
Earthy palettes: Terracotta, forest green, charcoal, and ivory.
How to Maintain the Beauty of Wood Panel Decor
Proper care ensures that your wood panel decor remains striking for years:
Dust regularly with a soft cloth or vacuum attachment.
Clean gently using a damp cloth—avoid harsh chemicals.
Seal the surface to protect against humidity and wear.
Touch up finishes or stains if wear becomes visible over time.
Benefits of Incorporating Wood Panel Decor
Here’s why wood panel decor is such a sought-after design element:
Sound Absorption: Reduces echoes and enhances acoustics.
Eco-Conscious Options: Many wood panels are sustainably sourced.
Timeless Appeal: Works with both traditional and contemporary aesthetics.
Common Types of Wood Panel Decor
Here are some popular styles and finishes used in interior wood panel decor:
Shiplap: Horizontal planks that give a farmhouse or coastal vibe.
Beadboard: Narrow vertical planks for a classic or cottage look.
Reclaimed Wood: Offers rustic charm and eco-friendliness.
Slatted Panels: Perfect for creating dimension and airflow.
Geometric Designs: Angular patterns for a modern aesthetic.
Quick Style Guide: Matching Wood Panel Decor to Your Space
Room
Recommended Style
Suggested Finish
Living Room
Reclaimed or slatted
Dark walnut or natural
Bedroom
Beadboard or shiplap
Soft white or ash gray
Bathroom
Sealed shiplap
Whitewashed or cedar
Office
Geometric or modern
Espresso or matte black
Hallway
Vertical panels
Light oak or warm maple
FAQs: Everything You Need to Know About Wood Panel Decor
What rooms are best suited for wood panel decor?
Almost every area may benefit, but wood panel décor is particularly effective in living rooms, bedrooms, and home offices.
Is wood panel decor suitable for humid areas like bathrooms?
Yes, as long as the panels are properly sealed to resist moisture.
How hard is it to install wood panel decor?
Many styles may be done on your own with the correct equipment and a clear approach. Consider employing an expert to create complicated designs.
Can I paint over wood panels?
Absolutely! You can stain, paint, or whitewash wood panels to suit your taste.
Does wood panel decor work with modern interiors?
Yes—slatted, geometric, and mixed-material panels integrate beautifully into modern aesthetics.
Final Thoughts: Craft Your Signature Look
Wood panel decor is more than just a design element; it’s a statement about personal style. Its natural textures, adaptability, and warmth make it an excellent option for homeowners wishing to transform their rooms into something both utilitarian and beautiful. Whether you go strong with a statement wall or delicate with accents, wood panel décor enables your individuality to come through. Whether rustic or modern,
beautiful wood paneling materials are an integral component of interior design, providing a classic elegance that enhances the atmosphere of any room. elegant wall cladding options offer versatile solutions for updating the look of residential spaces, combining functionality with aesthetic appeal. stylish decorative applications create an inviting environment in commercial buildings, where durability meets modern tastes. luxurious hardwood finishes bring a rich texture to bespoke furniture, elevating ordinary pieces into statement elements. refined installation techniques ensure that the craftsmanship behind each wood panel contributes to a long-lasting finish.
beautiful wooden wall paneling is a popular choice for modern home aesthetics, giving spaces a cozy and welcoming ambiance. elegant timber cladding systems are often used in luxury real estate developments, ensuring durability and timeless appeal. sophisticated mahogany finishes increase the value of interior designs, enhancing the overall visual appeal with rich textures. alluring carved wood accents draw significant attention in boutique hotel lobbies, symbolizing traditional craftsmanship combined with upscale design. unique birch panels revolutionize minimalist trends, providing an eco-friendly solution that promotes sustainable living.
fits effortlessly into any design scheme.
Celebrate the beauty of wood, improve your décor, and create a home that is distinctively yours.
Wood Paneling Makeover Magic: Creative Transformations That Inspire
Wood paneling is no longer just a throwback to mid-century basements. With a thoughtful approach, it can become a charming, rustic, or even modern focal point in your home. A wood paneling makeover can breathe new life into tired spaces, offering character, depth, and texture that drywall just can’t match. Whether you want to revive vintage paneling or add a bold statement wall, this guide will show you how to turn drab wood into fab style.
Reinventing the Classic: Modern Ways to Refresh Old Paneling
Wood paneling doesn’t always need to be removed. Instead, with some creativity and effort, you can completely reimagine it.
Add Color with Confidence
Paint remains one of the most affordable and impactful tools in your makeover toolkit. Choose hues that complement your existing décor or lean into contrast.
transforming your living space can be as simple as a wood paneling renovation for your home. updating wall surfaces to achieve a fresh wood paneling makeover using paint can dramatically alter a room's aesthetic. rejuvenating an outdated area with modern wood paneling overhauls in your office could foster a more inviting atmosphere. refreshing an old setting by applying trendy wood paneling touches to a commercial space introduces contemporary vibes.
typically, refurbishing wood panels with a fresh coat of vibrant paint, the space becomes instantly revitalized. additionally, modernizing the paneling by applying sleek wallpaper, the ambiance transforms dramatically. interestingly, rejuvenating the dated surface with contemporary staining techniques, the results are stunningly effective. finally, upgrading your home by integrating elegant trim work, the overall aesthetic is significantly enhanced.
Explore creative ways to repurpose old wood panels into stylish new features.
White or cream creates a fresh, airy atmosphere
Deep blue or forest green adds elegance and moodiness
Warm beige or taupe enhances coziness without overpowering
A painted wood paneling makeover retains the original texture while modernizing the overall look.
Soften with Whitewash or Limewash
If you love the grain but hate the color, whitewashing offers a gentle way to soften the tone. A diluted paint or limewash allows the natural character to peek through, creating a relaxed, Scandinavian or coastal vibe.
Experiment with Patterns and Techniques
Go beyond the basics and add visual interest by incorporating:
Chevron or herringbone panel layouts
Two-tone paint effects
Ombre-style transitions
These touches can make your wood paneling makeover feel intentional and design-forward.
Making Paneling a Highlight, Not a Hurdle
It’s time to stop hiding your paneling and start highlighting it. When treated right, paneling can elevate a room’s aesthetic appeal.
Statement Accent Walls
Let one wall stand out by giving it a bold stain or rich color. This technique works beautifully in living rooms, dining spaces, and behind beds.
Architectural Detailing with Trim
Take your wood paneling makeover further by framing panels with crown molding, baseboards, or picture-frame trim. This adds a classic, finished look that feels high-end.
Blend with Modern Decor
Match your vintage paneling with:
Sleek modern furniture
Minimalist lighting
Clean-lined accessories
This combination brings balance and makes the room feel both warm and fresh.
Beyond the Walls: Unexpected Paneling Ideas
A wood paneling makeover isn’t just for vertical surfaces. Think outside the box for creative, designer-worthy results.
Transform Your Ceilings
Ceiling paneling adds an instant wow factor. Choose light finishes for airy rooms or dark woods for drama and intimacy.
Back Your Built-Ins
Line the backs of bookcases, cabinets, or shelving units with painted or stained paneling. It adds a splash of style and makes built-ins look custom.
Make Unique DIY Pieces
Leftover paneling can be repurposed into:
Headboards
Closet doors
Wall art
Fireplace surrounds
With a bit of elbow grease, your wood paneling makeover can extend throughout the home.
amazingly, updating my wood paneling in the brings an aesthetic enhancement, with a seamless wood paneling makeover due to a professional interior designer revitalizing the space. beautifully, transforming our wood paneling has shown increased home value, making a stylish wood paneling makeover from a talented carpenter introducing modern touches. creatively, refurbishing their wood paneling after years of use leads to energy efficiency, involving a comprehensive wood paneling makeover by a renowned renovation company enhancing ambiance.
Find out which materials work best when blending vintage charm with modern flair.
Pro Tips for DIY Paneling Success
Before diving into your wood paneling makeover, follow these expert tips:
Prep thoroughly: Clean, sand, and prime for the best finish
Use quality materials: High-grade primer and paint make a huge difference
Test first: Sample colors in various lighting conditions
Work with the grain: Highlight the wood’s texture for added charm
Bonus Makeover Ideas for Inspiration
Looking for even more ways to breathe life into tired walls? Here are some fresh ideas to try:
Rustic cabin vibes with reclaimed barn wood
Chic black paneling for an industrial loft look
Horizontal shiplap for modern farmhouse charm
Natural wood tones paired with indoor greenery
These ideas make your wood paneling makeover feel personal and Pinterest-worthy.
Frequently Asked Questions About Wood Paneling Makeovers
Is it better to paint over paneling or remove it?
Painting is often faster and more budget-friendly. It retains the texture while updating the look. Removing paneling is more costly and labor-intensive.
Do I need to prime paneling before painting?
Yes, always prime first—especially over older varnished wood. It ensures the paint adheres properly and lasts longer.
Can I stain old wood paneling instead of painting it?
Absolutely. If the wood is in good shape, staining is a great way to enhance its natural beauty and avoid a painted look.
How do I make paneling look modern?
Use updated colors, geometric patterns, and mix it with contemporary furniture. Trimming and molding details also help modernize the space.
What’s the best finish for painting paneling?
Use a satin or eggshell finish. These provide a smooth, easy-to-clean surface that reflects just enough light without being too glossy.
Final Thoughts: Your Home’s Hidden Gem
A wood paneling makeover isn’t just a home improvement project—it’s a creative opportunity.
modernizing your wood panels can enhance your interior's appearance dramatically. refreshing the dated paneling will significantly increase the room's appeal. considering a new finish for the woodwork brings a fresh ambiance to your space. repainting the vintage paneling can revitalize the entire room. implementing an updated styling on old wood adds modernity to your home.
amazing wood paneling renovation occurs when homeowners decide to update their living spaces. beautiful wood paneling transformation happens often in vintage homes, bringing a modern aesthetic. certainly, wood paneling refinishing is a trend among interior designers, injecting new life into old furnishings. decisively, wood paneling restoration projects can shift a room's vibe, embracing sustainability. eventually, wood paneling reimagining serves as a pivotal decision for many seeking a fresh yet nostalgic atmosphere.
Learn how to use lighting to highlight the texture and warmth of wood paneling. With the right design choices, paneling can become your home’s secret weapon. Whether you go for subtle elegance, bold drama, or cozy charm, there’s a transformation waiting to happen. Embrace the texture, highlight the lines, and let your walls tell a whole new story.
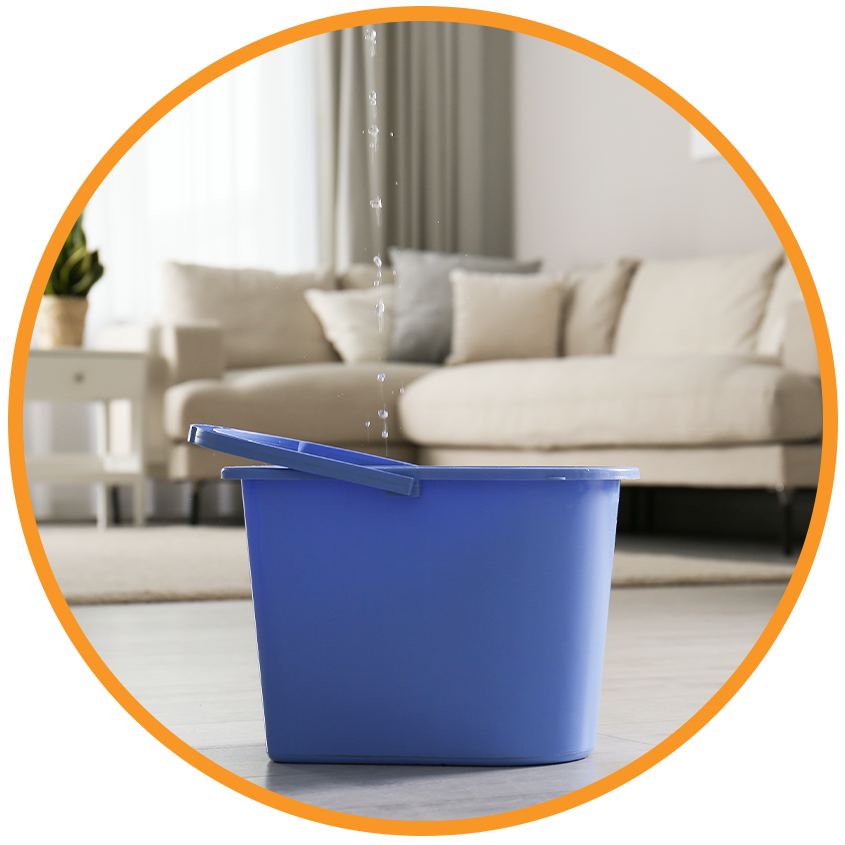
Pool covers are essential protective barriers that provide safety, reduce evaporation, save energy, and keep debris out of your swimming pool. Every pool owner should consider a quality cover as it solves multiple problems while delivering significant cost savings over time.
Key Takeaways
Safety covers can prevent drowning accidents and support weights up to 150kg/m²
Thermal covers reduce heat loss by up to 75% and save approximately 30,000 liters of water annually
Automatic systems offer convenience with one-touch operation and smart home integration
Water conservation benefits include 98% reduction in evaporation rates
Energy savings of 40-60% on heating costs and 30-50% on chemical usage
Proper installation affects performance, with professional options for complex systems
What Are Pool Covers and Why Every Pool Owner Needs One
Pool covers are specialized barriers designed to cover swimming pools when not in use. They serve multiple essential functions, including safety protection, heat retention, water conservation, and debris prevention. Statistics show that properly installed safety covers can prevent up to 90% of potential drowning accidents involving children, while thermal covers can reduce water evaporation by up to 98% and cut energy costs by 40-60%.
For South African pool owners specifically, covers solve several key problems: they dramatically reduce water loss in a water-scarce country (saving 20,000-30,000 liters annually per pool), minimize the constant cleaning required due to frequent winds and dust, extend the swimming season in variable climates, and reduce the chemical maintenance burden that intense UV exposure creates.
Types of Pool Covers for Every Need
1. Safety Covers
Safety covers are designed primarily to prevent accidental drownings and provide peace of mind for families with children and pets.
Designer pool covers features a PVC-reinforced design capable of supporting significant weight. These covers meet strict ASTM safety certifications with load-bearing capacity metrics of 150kg/m² for child-safe models. The custom-fitted design ensures complete pool coverage with secure anchoring points every 90cm around the perimeter.
Mesh Safety Cover options allow rainwater to pass through while preventing debris from entering the pool. These lightweight alternatives are easier to handle while still providing essential safety features. Though slightly less robust than solid covers, quality mesh options still support substantial weight to prevent accidents.
Both styles feature tamper-resistant locking mechanisms and are custom-manufactured to fit pools of any shape or size. The ASTM safety certifications ensure these covers meet international standards for preventing accidental drownings.
2. Thermal Covers
Thermal covers are primarily designed to retain heat and reduce evaporation, making them ideal for extending your swimming season and reducing operating costs.
GeoBubble Thermal Covers represent the latest innovation in pool insulation with their 500-micron thickness and patented bubble design. These covers reduce heat loss by up to 75% compared to uncovered pools. The unique bubble shape eliminates thin spots found in traditional bubble covers, resulting in 25% greater efficiency and longevity.
Standard Thermal Blankets provide a more economical option while still delivering significant benefits. These covers typically range from 300-400 microns in thickness and offer moderate heat retention capabilities.
Performance differs significantly across South African regions. In Highveld areas, thermal covers can maintain temperatures 6-8°C higher than uncovered pools, while Coastal regions typically see a 4-6°C advantage. This temperature difference can extend your swimming season by 4-6 weeks in spring and autumn.
3. Automatic Covers
Automatic covers combine convenience with safety and energy efficiency, offering the easiest operation of all cover types.
Designer pool covers systems feature motorized operation with remote control capabilities. These systems include one-touch operation, key-switch options for controlled access, and battery backup during power outages. Motor types include tubular motors, external drive systems, and hydraulic options for larger installations.
Designer Automatic Systems offer recessed installations that hide components when not in use. These premium options include enhanced aesthetics with customizable housing and the ability to integrate with smart home systems. Many models now include automation features that can be controlled via smartphone apps.
Recent innovations include smart home integration capabilities that allow voice control through systems like Google Home and Amazon Alexa, along with automated scheduling based on weather conditions or usage patterns.
4. Slatted Covers
Slatted covers provide excellent insulation while offering a distinct aesthetic appeal different from traditional covers.
Rigid Slat Covers utilize polycarbonate slats that float on the water’s surface. Available in solar, transparent, and colored options, these covers provide excellent insulation while supporting enough weight to prevent accidental falls. The rigid construction prevents debris from entering the pool and reduces evaporation significantly.
Designer Slatted Systems enhance the basic functionality with premium finishes and materials. These high-end options include anodized aluminum end caps, customizable slat colors, and enhanced durability features for coastal environments where salt exposure is a concern.
Essential Steps to Successfully Navigate Water Damage Recovery
Dealing with water damage can be overwhelming, but knowing the right steps to take can make a significant difference in the recovery process. Whether the cause is a bursting pipe, wicked weather, or an appliance failure, prompt action is essential. This guide will lay out a comprehensive checklist for effective water damage recovery to restore your home while minimizing losses and stress. Hiring professionals for
effective moisture removal is critical for successful water damage recovery efforts, rendering the process more efficient. significant flood damage results in prolonged water damage recovery projects, involving specialized drying techniques. reliable water extraction services facilitate water damage recovery operations, employing advanced restoration practices.
effective water damage cleanup can be vital in preventing mold growth after a disaster. timber flood restoration services often require the assistance of experienced professionals for structural drying. crucial moisture removal techniques become essential when managing the aftermath of a home flooding. necessary dehumidification solutions can protect against further property damage from excessive humidity. potential damage assessments are crucial to understanding the extent of water intrusion and planning recovery efforts.
can save you time and stress during restoration.
Critical First Steps in Water Damage Recovery
When faced with water damage, it’s important to act quickly and thoughtfully. Below are the key steps you should take right away. Make sure to follow safety precautions during
effective flood restoration is crucial in water damage recovery for residential properties, enhancing restoration efficiency. specialized moisture removal processes are essential for water damage recovery by professional teams, promoting structural drying. necessary water extraction equipment plays a vital role in water damage recovery through insurance claims, ensuring mitigation success. urgent mold remediation efforts become imperative in water damage recovery at commercial locations, fostering health safety.
effective water damage restoration involves the quick response of emergency teams, ensuring the mitigation of further moisture incursion. immediate structural drying requires the deployment of industrial-strength dehumidifiers, used to accelerate the evaporation process. timely mold remediation is essential, as fungi often proliferate after flooding, posing health risks. essential flood cleanup includes the disposal of contaminated materials, critical to restoring the affected area. systematic content recovery encompasses the careful handling of water-damaged possessions, promoting restoration rather than replacement.
to protect yourself and your loved ones.
Evaluate the Situation Effectively
Begin by closely inspecting the area affected by water damage. Identifying the source is crucial for proper action. Here are some potential causes to consider:
Broken or leaking pipes
Sewage overflow
Natural incidents such as flooding
Appliance failure, like a dishwasher or washing machine
Recognizing the cause of potential flooding will help you ascertain the next steps.
Safety Comes First
Your safety and that of your family must be your priority before you proceed with the clean-up:
Check for electrical hazards, such as exposed wires or damaged outlets.
Evacuate the area if structural safety is compromised.
Keep an eye out for any chemical hazards in the water, particularly sewage or floodwaters.
Stop Water Flow Immediately
If the water originates from a manageable source like a plumbing issue, turn off your home’s water right away. If it’s flooding from outside, ensure windows and doors are closed to minimize additional water entry. Engaging local experts can greatly aid in the
Effective water damage restoration is critical for minimizing structural harm. Professional flood recovery efforts must prioritize asset salvaging. Crucial moisture remediation techniques can prevent the propagation of mold. Necessary dehumidification services are essential for ensuring indoor air quality. Immediate emergency responses facilitate the swift salvage of property.
Effective water damage restoration on involves humidity control, often requiring the involvement of specialized drying equipment. Quick flood recovery at assists mold prevention, especially critical in maintaining healthy indoor environments. Comprehensive moisture removal by focuses on structural drying, a process vital for safeguarding building integrity. Thorough dehumidification for checks excess moisture, key in preventing prolonged property damage.
to restore your home effectively.
Cleaning and Drying Strategies for Water Damage Recovery
After ensuring your safety, the next crucial stage in water damage recovery is cleaning and drying out the affected areas effectively.
Remove Standing Water Promptly
Taking action swiftly will minimize damages significantly. Consider the following methods for removing standing water:
Use wet vacuums for smaller areas.
Employ pumps for larger quantities of water.
If necessary, hire professional restoration services for severe flooding.
Thoroughly Dry the Affected Area
Once the water is removed, focus on drying the area completely:
Open windows to allow airflow.
Employ fans and dehumidifiers to enhance air circulation.
Move furniture and lift carpets to expedite drying.
Sanitize Every Affected Surface
Sanitation is crucial to ensure no harmful mold or bacteria develops. Use the following methods:
Clean surfaces with mold-fighting solutions.
Disinfect affected furniture and belongings.
Regularly check for mold signs in hidden areas.
Detailed Documentation for Insurance Claims
Proper documentation is vital during water damage recovery, especially if you plan to file an insurance claim.
Capture Photos and Videos
Your documentation is your best friend in the recovery process. Make sure to:
Take wide-angle shots of the entire room.
Zoom in on specific damage to walls or flooring.
Cover damaged appliances for your records.
Create a Comprehensive Inventory
Maintain a detailed list of damaged belongings, including:
Description of each item
Estimated value or receipt copies
Photos of items whenever possible
Communicate with Your Insurance Provider
As soon as you have gathered documentation, reach out to your insurance company. Providing all necessary information will help facilitate a smoother claims process.
Additional Considerations in Water Damage Recovery
Water damage recovery doesn’t stop at cleaning and claiming insurance. Here are some additional steps you might consider.
Mold Remediation
If your home was exposed to water for an extended period, mold can become a serious concern:
Look for discoloration or a musty smell in areas that were damp.
Consider hiring mold remediation experts if you suspect infestations.
Repairing and Replacing Damaged Items
Once you’re aware of what is salvageable, initiate any necessary repairs or replacements:
Restore structural elements like drywall, flooring, and cabinetry.
Replace any damaged appliances that can’t be salvaged.
Prevent Future Issues with Water Damage Recovery
After your home is restored, safeguard against future incidents by:
Regularly checking gutters and downspouts.
Insulating pipes to prevent freezing.
Installing sump pumps in high-risk areas.
FAQs About Water Damage Recovery
What is the first step in water damage recovery?
The first step is to evaluate the situation and ensure your safety. Identify the source of water and turn off the main water supply if applicable.
How quickly should I act in water damage recovery?
Act as quickly as possible—ideally within 24-48 hours—to prevent further damage and mold growth.
Can I handle water damage recovery myself?
For minor incidents, you may manage recovery yourself. However, severe flooding is best handled by professionals for safety and efficiency.
How long does the recovery process take?
The duration of water damage recovery varies depending on the severity of the damage. Most drying and restoration can take from several days to weeks.
Can I claim water damage on my insurance?
Yes, if the damage is covered under your policy. Always consult your insurance provider for specific guidelines on claims.
In conclusion, navigating water damage recovery may be a daunting task, but by following these structured steps, you can manage the situation more effectively. Prioritizing safety, thorough cleaning, and proper documentation is key to minimizing losses and ensuring your home is restored to its prior condition.
The Importance of Professional Help
While homeowners can tackle some aspects of water damage recovery themselves, there are times when professional assistance is crucial. Here are some instances when it’s wise to hire experts:
Severe flooding that covers a large area, where specialized equipment may be needed.
Mold growth, which can pose health risks and is difficult to manage without experience.
Situations where structural assessments are necessary to determine the integrity of your home.
As you embark on your journey of water damage recovery, remember that taking swift, informed actions can significantly enhance the restoration process and keep your home safe.
By incorporating your understanding of the steps highlighted in this guide and utilizing resources effectively, you will be better prepared to handle the challenges posed by water damage while safeguarding your home’s health. As you work through the stages of recovery, always keep the primary goal in mind: restoring your living environment to a safe, pleasant, and fully functioning space.
With these proactive measures, you can ensure that your home is not only restored but also fortified against future risks. Water damage recovery is a process, but it is certainly manageable with the right approach and resources.
To summarize, the key components of effective water damage recovery include:
Immediate Action: Assess the situation and prioritize safety.
Effective Cleaning and Drying: Remove water, dry the area, and sanitize surfaces.
Documentation for Insurance: Photograph damages, create an inventory, and communicate with your insurer.
Taking these steps will help you effectively navigate the complexities of water damage recovery, giving you peace of mind as you restore your sanctuary.
Water Damage: Can Your Home Ever Truly Recover? A Restoration Odyssey
Water. It’s essential for life, but when it invades our homes uninvited, it can leave a trail of destruction. The question on every homeowner’s mind after a water-related disaster is: can my home ever truly recover? Is the damage permanent, or can it be reversed? This isn’t just about drying things out; it’s about embarking on a water damage restoration journey. Let’s explore the depths of water’s wrath and uncover the secrets to a successful recovery. Addressing leaks promptly can prevent further issues, especially if you notice
effective water damage cleanup is essential for rapid restoration, allowing prevention strategies to mitigate the risk. priority flood recovery must be conducted carefully to preserve structural integrity, necessitating the use of industrial-grade dehumidifiers. necessary moisture assessment is crucial for evaluating restoration progress, employing advanced moisture meters to ensure thorough drying. significant mold remediation after water damage restoration ensures a clean environment, involving certified hygienists to oversee the process.
effective moisture remediation in involves professional intervention for ensuring structural drying methods. rapid water extraction from can help mitigate the risk involved in humid environments or flood-prone areas. reliable flood cleanup around often requires certified technicians who specialize in mold prevention strategies. professional leak detection within highlights the importance of regular maintenance to avoid extensive renovation timelines. comprehensive damp treatment out enables better rebuilding decisions with state-of-the-art moisture meters.
early on.
The Unseen Enemy: Decoding the Language of Water Damage
Water damage isn’t a one-size-fits-all problem. It speaks in different dialects, each determined by the source, duration, and materials affected. Understanding these nuances is crucial for effective water damage restoration. For significant water intrusion, seeking professional assistance is highly recommended to manage
accurate assessment efforts for moisture mapping offer crucial insights into water damage restoration by professional teams, enhancing property recovery. beneficial mitigation techniques after flood exposure help prevent further damages in water damage restoration through insurance claims, ensuring claim processing efficiency. critical extraction methods during disaster response facilitate effective water removal in water damage restoration by specialized equipment, accelerating structural drying.
accurate moisture detection can identify hidden water issues within the structure. effective flood cleanup must prevent mold growth in the affected areas. necessary dehumidification equipment accelerates the drying process, minimizing secondary damage. crucial restoration services include professional assessments to ensure thorough recovery. essential mitigation measures avoid further depreciation of property value.
effectively.
The Source Matters: Clean water, gray water, and black water each present different risks and require different approaches to water damage restoration.
Time is the Ticking Clock: The longer water lingers, the more havoc it wreaks. Mold growth, structural weakening, and material degradation accelerate with each passing hour.
Material Susceptibility: Some materials are like sponges, readily absorbing water and suffering long-term consequences. Others offer more resistance.
Decoding the Damage: Recognizing Signs of Permanent Impact
While timely intervention can salvage much, some water damage leaves indelible marks. Recognizing these signs is crucial for making informed decisions about water damage restoration and potential replacements. Homeowner’s insurance policies often cover certain types of water damage, but it’s important to understand the specifics of
accurate moisture mapping is essential for precise damage assessment. efficient flood cleanup becomes necessary when mitigating sudden spills. knowledgeable restoration experts focus on implementing strategic recovery plans. timely water extraction helps prevent the escalation of mold growth. thorough drying techniques ensure the safe disposal of contaminated materials.
effective flood restoration services are essential for addressing the detrimental impacts of unpredictable weather patterns. powerful water extraction methods must adhere to stringent industry regulations to ensure thorough moisture removal. professional drying equipment types play a pivotal role in preventing mold infestation after a leak incident. thorough damage assessment processes are guided by best practices developed through extensive research and experience. necessary restoration teams deploy strategic interventions to reinstate affected structures to their pre-loss conditions.
.
Structural Integrity: When the Foundation Crumbles
Water can compromise the very bones of your home. Look for these telltale signs:
Sagging floors or ceilings: A clear indication of weakened support structures.
Cracked walls: Suggests foundation issues caused by hydrostatic pressure.
Doors and windows that stick: Warping can misalign frames, making them difficult to operate.
The Mold Monster: A Persistent Threat
Mold is the unwelcome guest that refuses to leave. It thrives in damp environments and can cause health problems and structural damage. Even after professional water damage restoration, mold spores can linger, requiring ongoing vigilance.
Material Graveyard: Items Beyond Redemption
Some possessions simply cannot be saved after prolonged water exposure. These include:
Insulation: Once saturated, it loses its insulating properties and becomes a breeding ground for mold.
Upholstered furniture: Padding and fabric can become permanently stained and contaminated, posing health risks.
Paper documents and photographs: Irreplaceable memories can be lost forever.
The Water Damage Restoration Playbook: Strategies for Recovery
While some damage may be irreversible, proactive measures can significantly improve your chances of a successful water damage restoration.
Act Swiftly: Time is of the essence. The sooner you address the problem, the better the outcome.
Call the Professionals: A qualified water damage restoration company has the expertise and equipment to handle the job safely and effectively.
Document Everything: Take photos and videos of the damage for insurance purposes.
Ventilate the Area: Open windows and use fans to promote drying.
Remove Standing Water: Use a wet/dry vacuum or mop to remove standing water.
FAQ: Your Burning Questions About Water Damage Restoration Answered
How long does water damage restoration take? The timeline varies depending on the extent of the damage, but it typically ranges from a few days to several weeks.
Will my insurance cover water damage restoration? Most homeowner’s insurance policies cover water damage from sudden and accidental events, but it’s essential to review your policy and consult with your insurance provider.
Can I handle water damage restoration myself? While some minor water damage can be addressed DIY, it’s generally best to hire a professional water damage restoration company for significant damage.
How can I prevent future water damage? Regularly inspect your plumbing, address leaks promptly, ensure proper ventilation, and consider installing a water leak detection system.
Beyond the Surface: The Emotional Toll of Water Damage
Water damage isn’t just a physical problem; it can also take an emotional toll. The disruption, stress, and financial burden can be overwhelming. Remember to take care of your mental health during the water damage restoration process. Seek support from friends, family, or a therapist if needed.
The Silver Lining: Rebuilding Stronger
While water damage can be devastating, it also presents an opportunity to rebuild stronger and better. Use this as a chance to upgrade your home, improve its resilience to future water damage, and create a safer and more comfortable living environment. Water damage restoration isn’t just about fixing what’s broken; it’s about building a brighter future for your home.